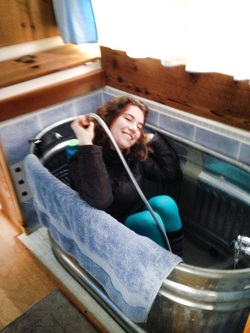
 I love this idea for a bathtub!
source: http://thetinylife.com/ another description of the steps from a different source.
"The layers will go something like this. Trailer deck, metal flashing, 6 mil vapor barrier, treated wood framing filled with foam, then plywood subfloor." The 2 biggest differences between this and the tiny house on the prairies folks seem to be this guy is using a vapor barrier (like Tyvek I believe) and he used foam insulation instead of wool. source: http://thetinylife.com/anchoring-a-tiny-house-to-the-trailer/ I'm starting a list of tools/materials/techniques other tiny house builders have used. some of it I've never heard of! probably NoBigDeal. impact wrench $329 "ideal for driving and removing fasteners in wood, metal or concrete" (worthwhile investment) miter saw $599 "powers through dimensional lumber and molding at angles up to 50 degrees left and 60 degrees right for versatility." aluminum flashing staple gun (to attach flashing to the trailer bed) table saw $499 but varies a lot (for cutting plywood) belt sander $70 for sanding the rough jigsawed sink corners in butcher block countertops circular saw for cutting out undermount sink jigsaw for cutting rounded corners in sink hole 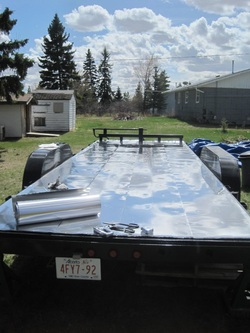 step 1: level trailer. step 2: attach flashing to trailer bed with staple gun source: http://tinyhouseontheprairies.wordpress.com/page/3/ 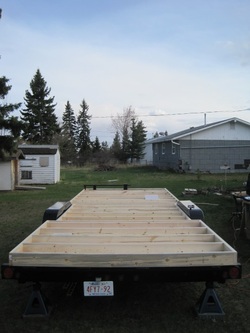 step 3: build subfloor using miter saw and 2x4's or 2x6's. step 4: use impact wrench to attach subfloor joists to the frame then bolt onto the flashed trailer bed. p.s. I'm very interested in understanding what happens at that wheel bed area. do the walls go around it? or is it just boxed out and undiscernable from above? 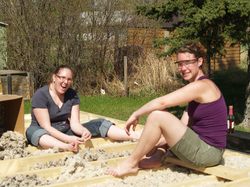 step 5: insert insulation between joists (here they used sheep's wool loose insulation, which is apparently a big pain and messy too. they might make it in batt insulation now which is supposed to be better as it's like a big sheet of it.) 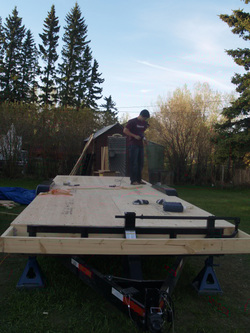 step 6: put plywood on top (which is called the subfloor)
one of the important issues to tackle first and foremost: what color the house should be. well, important for me at least. I was thinking maybe grey clapboards with natural grey shingles at the gable ends. and white trim. with yellow accents possibly? but instead of grey paint I'm wondering if grey stain would be more durable and also look good. I hate hate hate brown stain, but grey could be really nice and durable I said! I also like a charcoal grey metal roof.
 strawbale!
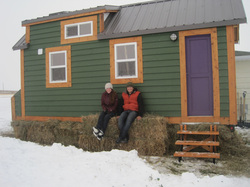
"We’ve been looking around for the best option to insulate under the trailer (it gets COLD here) and since we’re in the middle of the prairies, straw bales is the easiest and cheapest way to go. The one thing we’re concerned about with straw bales is mice, but, since we have 2 cats inside, and there’s lots of barn cats on the farm, we’re thinking it will all work out. (otherwise, we’ll just get rid of the straw I guess!)" http://tinyhouseontheprairies.wordpress.com/page/2/#jp-carousel-282 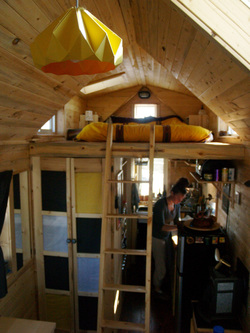 I bet if I included at least one beam going across the center of the room (kinda where this picture was taken from) I could do a ladder similar to the one at The Cottage that can lift up out of the way during the daytime. p.s. I like this design--looks like others I've seen. I like how there is a roof bumpout at the loft with windows both sides and also a skylight and another window at the end. 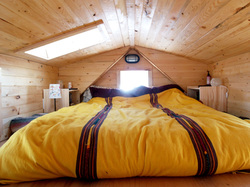 what a beautiful place to sleep. note: this is from http://tinyhouseontheprairies.wordpress.com 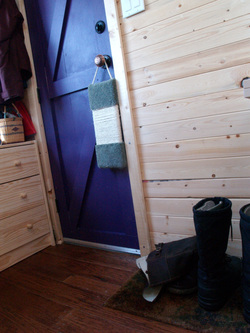 I like this purple door. side note: I don't see any point to a dutch door unless I have a dog (which I do actually want). Maine has so many bugs I would have to always have at least a screen. Will likely need a storm door too--it will be fun to stand at the glass storm door when it's snowing and look outside from my cozy warm tiny home. 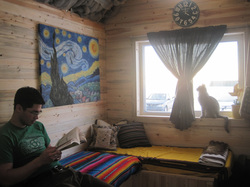 I like this layout for ample seating but also with storage underneath the benches (i'm assuming). I think I would also need a work surface though for all of my design work on the computer. so maybe i just do one comfy window seat with bench storage with optional semi-large worksurface...maybe it can be pulled up to the bench to use the bench as the seat.  window sills make perfect cup rests.  cute for xmas. who needs an xmas tree when you're surrounded by them outside! also, I like the window detail. cool to see how it was constructed. 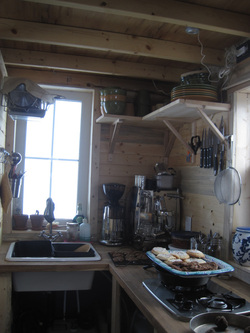 looks like IKEA dish rack hanging shelf on left. seems way too high for me at least. I like the magnetic knife rack (on wall or maybe on edge of countertop--easier to grab there). p.s. If I only have one sink (which makes a lot of sense), I would probably want a mirror in front of it. or at least close-by. 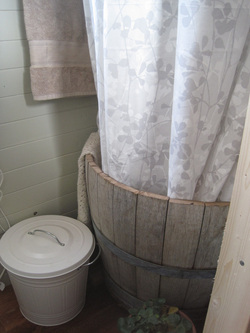 I love this cute shower! I think I want something more spacious but it is very cute.
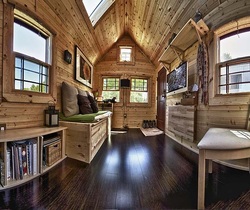
 I like plywood. looks like they used plywood for the window sill--I like that idea. source: http://www.tinyhousedesign.com/palm-to-palm-tiny-house/ 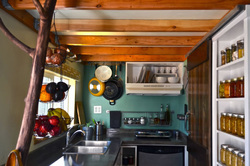 I also love sliding barn doors. would love to incorporate at least one of those. looks like they are using one here to conceal their pantry--which I also like. p.s. I also like their exposed beams--good idea as hanging stuff from ceiling will be helpful in a small space. plus that's one less step, no ceiling drywall required. leave the beams and hangers exposed. 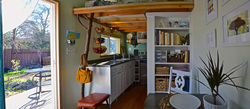 looks like they used IKEA cabinets. at first I thought the countertops were stainless steel but that backsplash looks like maybe it's granite or some other stone. not sure. this place is cute and I think I like the look of a side entrance over an entrance at the end resulting in a narrow tunnel to walk down.  looks like the sliding barn door must enclose the bathroom. wish they had a pic of that! where do they keep all their clothes?! up in the loft there are like 2 shirts and a pair of socks. they must have more clothes storage somewhere... 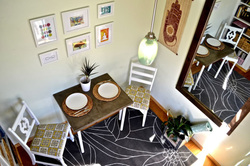 pretty big table area. i like this place and feel encouraged. "The whole thing cost less than $8500 to build and took about 9 months to manifest."
I would really really love to have radiant floor heating in my tiny home. #dreamcometrue
http://www.motherearthnews.com/renewable-energy/solar-hot-water-zm0z11zphe.aspx#axzz2yEDoEZNE having concrete floors w/ the radiant heat would be nice and good for durability and easy to clean (as long as I seal it right). Maybe I add a couple throw rugs. I guess it would be hard to stand on when cooking or standing for long periods, but I could wear indoor shoes and/or use rugs. and at least it would be a comfortable temperature. and if I have a dog it would be good for that. would likely use wood in other ways to keep the look comfortable and warm. maybe do radiant floor heating AND a woodstove? but a woodstove takes up a lot of space (relatively) so if I don't need one I guess that'd be better...but less cozy-seeming. it's heavy too though, but so is concrete and there is a risk of burning if someone brushes against it in the tiny space. of course, I would also love old reclaimed wideplank wood flooring like in grammie's house, so that's an option too. I read one review where the owner said his vent stack gets taken out by snow slides every winter. need to remember this and design around it to reduce/eliminate potential of snow slide at the vent stack. sun mar's website says vent stack should extend up 20-36" above roof peak to reduce downdraft (which would result in urine smell).
| Authordesigner. nature lover. introvert. artist. cat lover. cook. dirty hippie at heart. ArchivesCategories |
 RSS Feed